

WHAT YOU'LL NEED
Waxed paper
Cardboard for inside of clothes
Fabric or piece of clothing to "batik"
Washable glue
Fabric paint or dye
Iron
I have experimented with different types of washable glue:
Worst: Tacky fabric glue has been my least favorite. It did go on nice and thick but the lines shrank when drying so I ended up super thin with barely any distinction between colors. Also, it didn't soften up nicely like the other glues in water so there was a lot of picking and scrapping to get the glue off the fabric.
Best: Elmer's Blue Glue. This glue dried super fast in the same shape I squirted onto the fabric so there was no shrinkage of lines. To remove the glue I simply soaked in warm water for about 15 minutes, gently rubbed the fabric and the glue was gone.
 |
| Fabric before and after 1st Gluing |
In this tutorial the glue I used is white washable glue because I got 4 bottles for a buck at the dollar store. They worked great! There was no line shrinkage but it took over a day for the glue to dry completely and had to soak for a good hour before the glue was soft enough to rub off and then there still was a bit of scraping to do. But, it was cheap money and it got the job done.
The fabric is actually a skirt that I cut up. It had a broken zipper and torn hem but it still deserved a second shot. Now I just have to decide what to turn the pieces, and I'm taking suggestions.
Step 1. Cover your work surface with waxed paper and insert cardboard into clothing. Lay out your fabric or garment and draw your shapes with washable glue onto the pieces. You can make totally random shapes, trace around something, or make an actual drawing. Let dry completely.

Also, since the fabric I used was really thin I torn up a pair of jeans and laid them under the green fabric before painting. I knew the paint would soak through onto the waxed paper and rather than waste that paint, I used the denim to soak it up. I plan to use the jean fabric in a funky top hat, like the Hillbilly Top Hat I made recently. The waxed paper is still under the denim fabric.
 |
| Fabric after washing off glue |
As you can see the fabric, where I squirted the glue, is clearly visible after washing off the glue. You could be done now or take it to the next level like I did.
 |
| 2nd layer of glue |
 |
| Adding more green leaves |
So, I repeated the gluing process. Making more leaf shapes over deep red and gold splotches Then once the glue was dried I added some more green leaves.
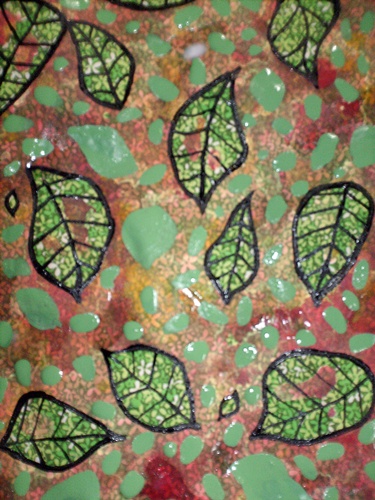
I let the paint dry, again. Soaked the pieces in warm water, again. Dried and ironed, again. Then added the fine details in black. I supposed I could have just left the fabric as is without the black as traditional batik is done. But, I like the look of bold black lines.
 |
| Finished Glue Batik Fabric |
No comments:
Post a Comment